Creating furniture from large live edge slabs.
2022-06-17


The patio table has various removable parts, such as the wedges. I decided to make a box from some of the Ash off-cuts to hold those, a spare adjuster bolt, and some touch-up oil. It worked out quite well.
2022-06-16


The patio dining table is done. I’m quite pleased with how it turned out. The cable stays work very well. Even just snug, they lock the structure solidly. Although I’m not a fan of the Osmo finishing oil, I will use it again for exterior grade projects. The final appearance is excellent. I’m just not fond of the aroma and viscosity. The screw adjusters work very well, and I will use that technique again.
2022-06-15
Osmo is OK, but I prefer Rubio for the single application, and Livos for aroma, price, and looks. The instructions on the tin say to apply it thinly with a brush and re-coat after 12 hours. That’s nonsense (that’s the polite version). It needs to be wiped dry and rubbed out. Otherwise the surface just looks sloppy. Fortunately it only needs 2 coats.
I decided that the base wasn’t stable enough, so I added cable stays. After twisting off 2 of the cheap (presumably Chinese-made) hooks, I got more and added a second set of cables. Now the base is very solid in all dimensions, even with the cables just snug. That’s another example of a lesson learned in my “Light-weight Design” course with Woldemar (Pete) Petri in my University days. Triangulation gives a structure strength. If you look carefully at the photo, you can just see the cables.
2022-06-12

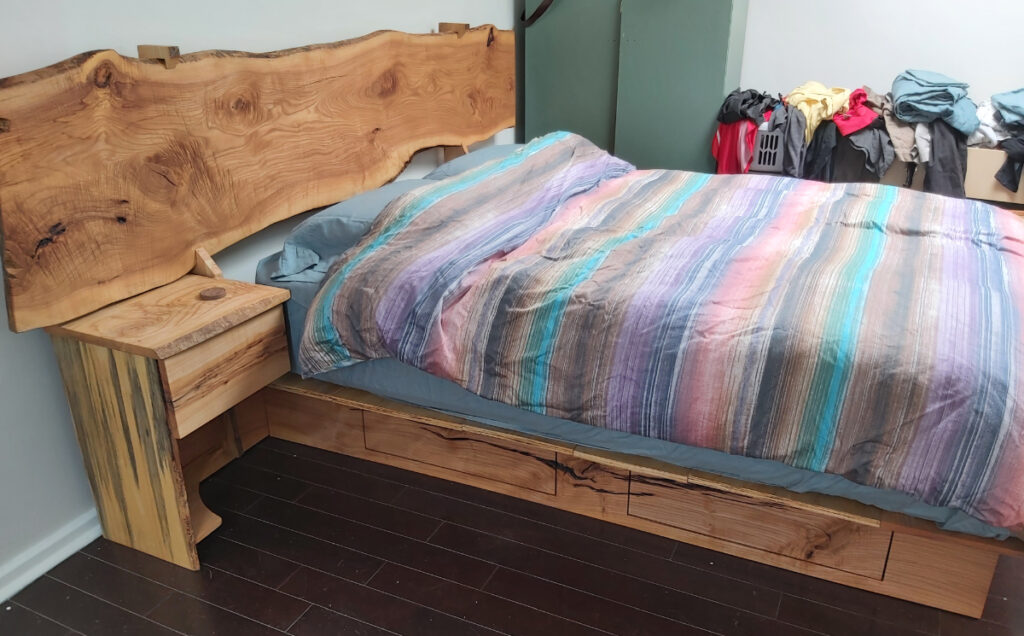
Here is the first bed in its new home. The assembly went smoothly and everything fit and aligned. I think all concerned are pleased with the results.
2022-06-12

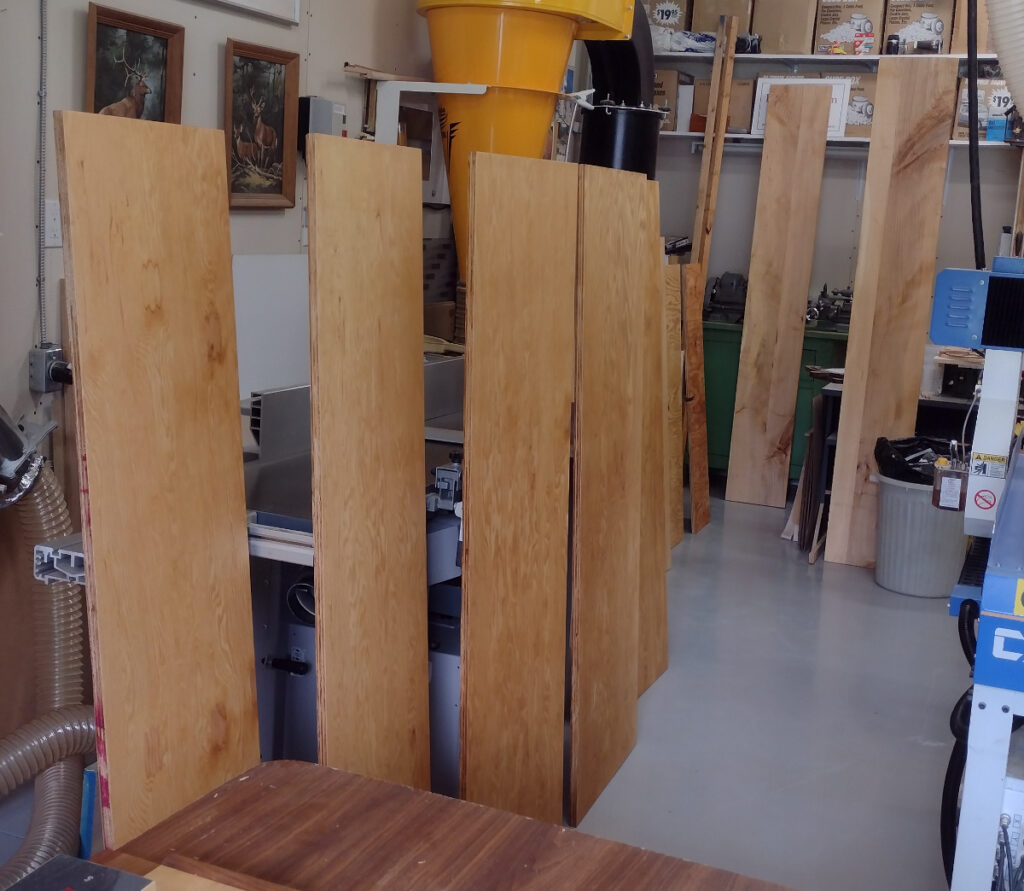
Here’s another iteration of “you can’t have too many clamps”. The five sections of plywood will form the central trough between the two slabs. The shorter side is the underside, dimensioned to just fit between the cross-supports.
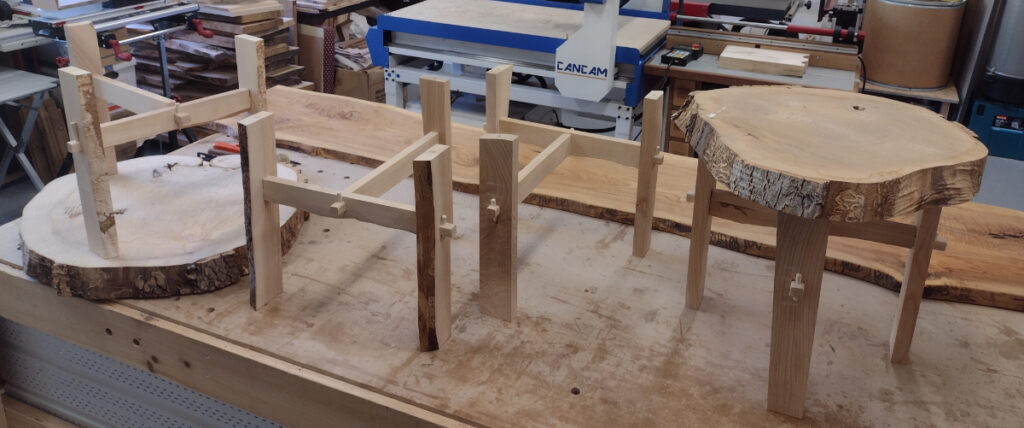
Once I had everything test assembled and the height adjusters installed I realized that the frame is kind of wobbly in the long dimension. I’ve come up with a diagonal brace approach using stainless steel braided cable, for which I need turnbuckles and hooks.
2022-06-11
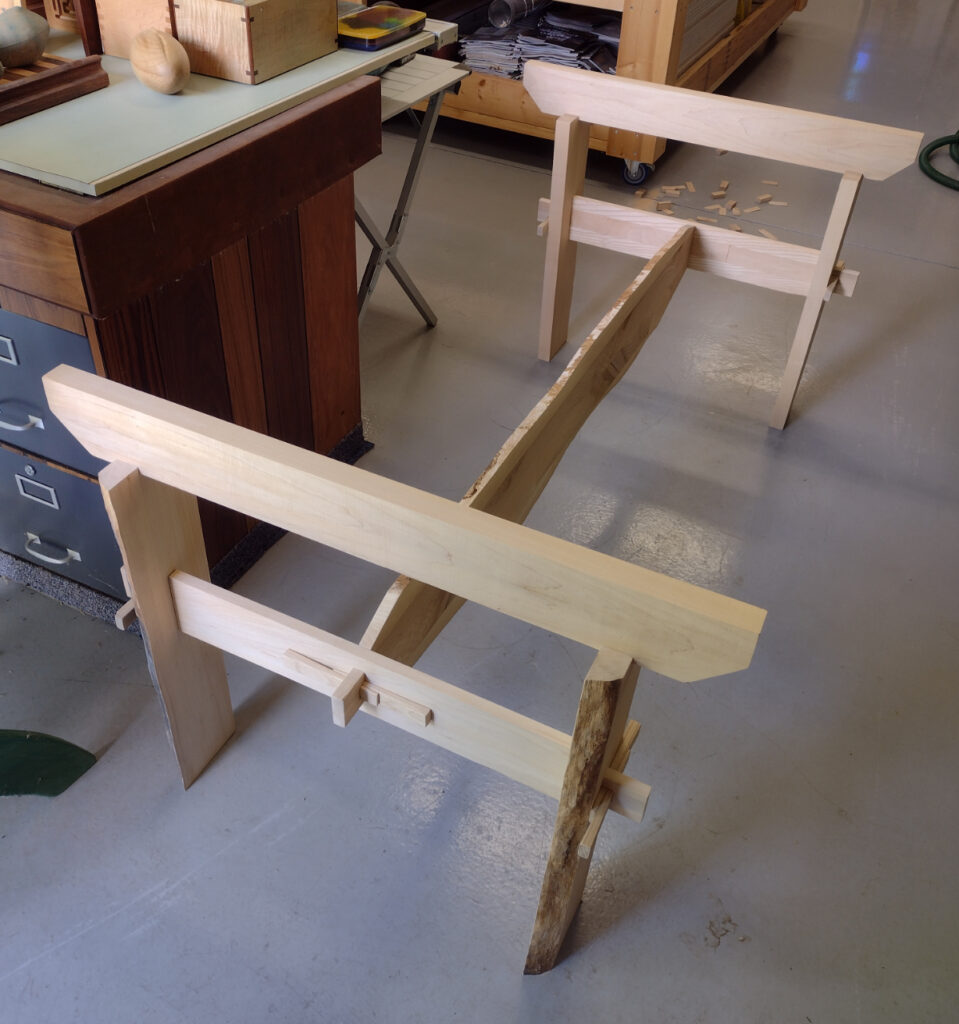
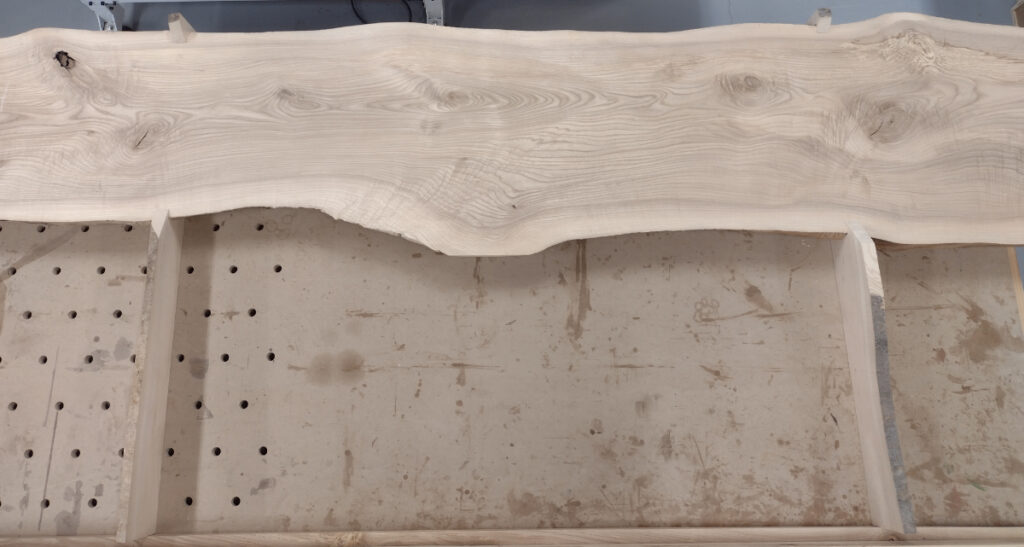
The far cross-brace was pieced together from separate off-cuts, as was the long stringer. The legs and stringer have live edges. The joints are mortise and tenon, with the tenons cross-pegged with Ash wedges. The assembly is solid, yet easy to take apart for transport. It will also deal well with climate changes – just knock in the wedges more if the joints get loose. The cross-supports are free-floating, but will have locator cutouts. This table will be on an outdoor patio in southern Greece, so I have designed all parts for wood movement.
2022-06-08

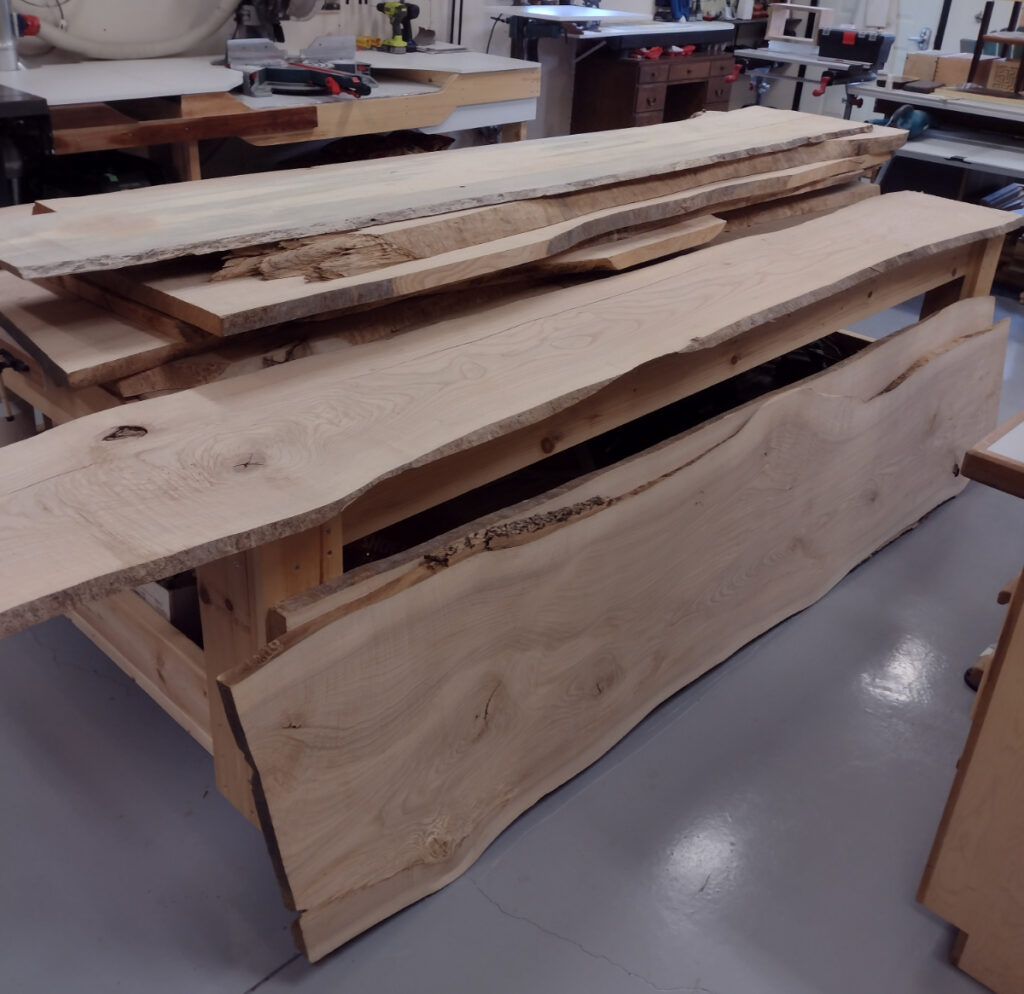
I think I’ll be able to get everything out of 3 slabs, 2 of which will be the table top. I have to use a bit of off-cut material from previous projects to make the cross braces and trough between the slabs.
2022-06-04

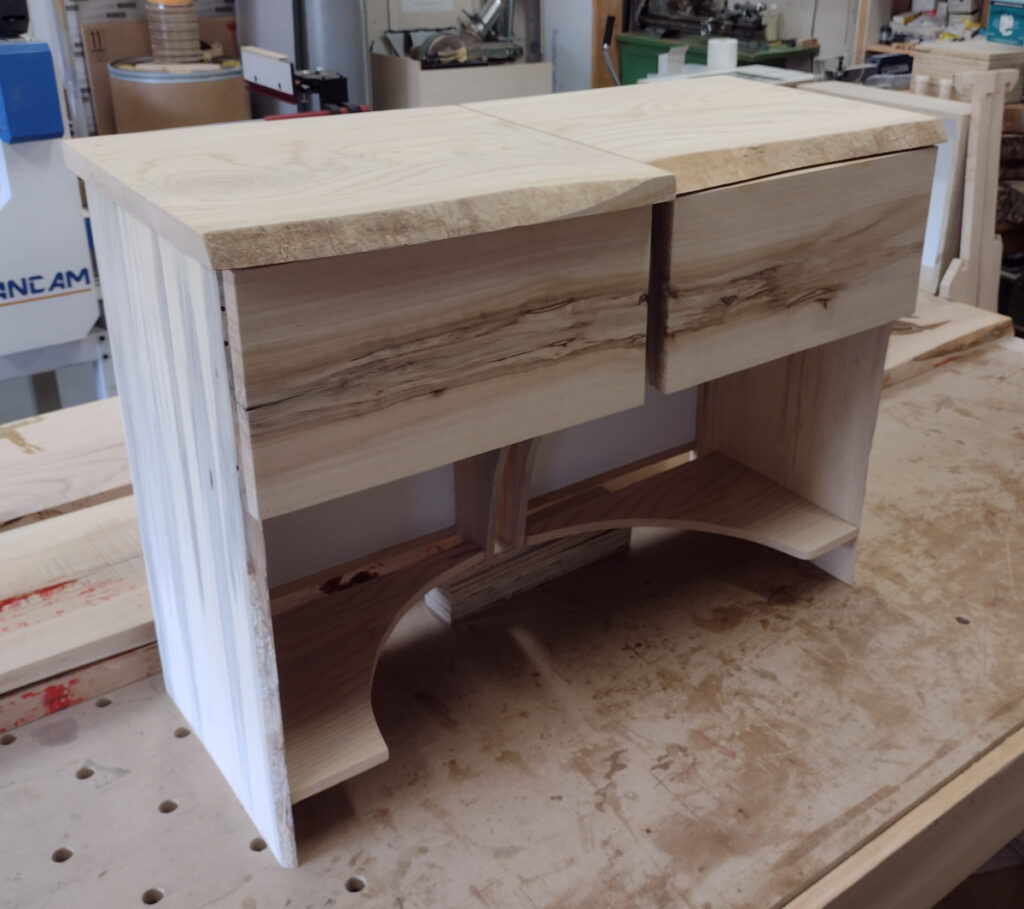
Bed #2 is done. The night tables of course go beside the frame, not on top, but I didn’t want to reassemble everything on the floor. I am particularly pleased with the tables. Next up: a robust country-style dining table for an outdoor dining room.
2022-06-03

Yesterday I applied the Rubio, and by this morning it was dry enough to touch. It still feels slightly oily, but won’t mark. The Rubio brought out the epoxy nicely. Under direct light it shows a nice colour and depth.
Installing the drawers was fairly straightforward, only one small adjustment was required.
2022-06-02
Ah, the fine aroma of Rubio Monocoat permeating the shop! Every part for Bed #2 is now finished. All that remains is to install the hardware and do a test assembly.
2022-05-31
This time there was enough plywood to comfortably make all the required parts. It helps that there weren’t any unusable delaminated areas. I did sand all surfaces, since this plywood was only G1S – Good 1 Side. For the drawers I found areas that look good on both sides.
2022-05-30

Nick dropped in yesterday evening. He didn’t like the “semi-transparent” grey finish either. This morning I planed the top and bottom and sanded them and the sides. I used the same Varathane as for the others. The small amount of grey still showing on the edges is subtle, and may add visual interest.
2022-05-29


The side tables went together surprisingly well. I did use about half my collection of clamps. The waterfall corner works very well. The tables are a bit narrower than usual. That’s because the grain is continuous from the bottom of one through the tops to the bottom of the other, so the plank length determined the width. The inside walls are from a different plank. All sections are 1″ thick, so these tables are massive.
2022-05-28

Today I found that my Bosch mitre saw cuts quite accurate mitres. Given that its right angle end cuts are usually off a degree or so (no matter how carefully I align everything), this was a pleasant surprise.
The side tables will be fairly narrow – 12″ outside – so that I could do a “waterfall” top to outer wall and still have material for a shelf, all out of the same plank. The inner wall will come from the plank in the background of the photo.
2022-05-24

I’ve flattened and dimensioned all four of the main frame pieces. The foot and head pieces aren’t the prettiest, but they are solid and functional. The internal support and platform will be 3/4″ plywood again, which I need to purchase in the city. I don’t plan to allow a stock picker at Castle to decide this time, I’ll select the sheets myself. The widest remaining Ash plank has several voids, which I’ve filled with two pours of coloured epoxy. This will be cut up and dimensioned for the side tables.
2022-05-21

This morning I had help moving the finished rounds tables to the lawn. Nick has similar chairs, so they should fit right in.

As soon as I finished with the tables I moved on to the second bed frame. I moved almost all the pile of wood slabs again – twice. The remaining Ash is narrower and of lower quality than the first set. I had to joint the best slabs to get them wide enough for the long frame pieces. The headboard is Maple, and just needs sanding. The widest of the Ash pieces will make the frame base and side tables.
2022-05-20

The Varathane I picked up goes on milky and turns transparent as it dries. The tin recommends “at least 4 coats”. The legs have 3 coats, the rounds undersides have 1, the tops have 4. It’ll have to do. Tomorrow I’ll do a light finish sanding and a test assembly for photos.
2022-05-18
The next project for Nick is to turn 4 rounds into outdoor side tables. I’m using a design I created some time ago for a tripod leg arrangement held together with tenons and wedges. The slabs are getting a rough sanding and cleanup of loose bark, then just an outdoor stain. The first one I tried is a “transparent” grey, which isn’t all that transparent. I’ll head back to Home Hardware and pick up another type.
2022-05-07


It’s done. Later last night I started the assembly and realized that I had missed finishing a few areas that show behind the side tables. I mixed some more Rubio, applied it to those areas, and had some left over. So I also applied it (and a bit more) to the tops of the plywood platform pieces. The insides of the drawers remain unfinished, but sanded.
There were a couple of minor adjustments required to the side tables to fit the headboard as installed. The drawers work fine. The shop and I all smell of Rubio finishing oil.
2022-05-06

This morning I sanded all the pieces. It took all morning. The Festool sander is proving its worth. A task I used to dread and do poorly is now almost contemplative, and produces excellent results. After lunch with friends I tackled the finishing. I suggested Rubio Monocoat, even though it’s $260 for 1.3 litres. A little goes a long way, and only a single coat is all it takes. I estimate that I used about a third, but I only did the surfaces that show. I didn’t do any of the plywood. I suspect I would need most of the remaining Rubio to do the upper surfaces of the platform. Even some of the hardwood absorbed a lot of the oil.
The application process is simple. After sanding to 120, I wiped all the surfaces. The oil is 2-part, with an accelerator to substantially reduce the cure time. Initial application is with a cloth or pad. After a few minutes the surface is wiped relatively dry. Then the Festool sander with a hard felt pad is used to buff out the finish. A day later the piece is ready to use.
Tomorrow I’ll do the final test assembly and take archival photos.
2022-05-05

In the end, the solution to getting the drawers to work smoothly was to assemble things in reverse. I removed the corner clips for the drawer sections, located the fronts to centre them in the openings, then attached the rear clips once the drawers ran smoothly. Then I installed the locator pins for the platform. This should force the frame into the proper position.
The side tables are supported on the inside edges by the top frame member. The outsides sit on the floor. I made the cutouts for the headboard support about 5 cm higher than I had planned. That should make it more a of a feature.
2022-05-04
That middle support piece is causing problems. It had a significant warp near the head end. The cross pieces force it into line, but nothing is quite square. This causes the drawers to be a bit askew. Some realignment will be necessary.
2022-05-03

Things continue to take longer than expected. Today I spent almost 5 hours attaching the assembly clips. Because of the warp in the middle divider, some “persuasion” will be necessary to insert all the cross dividers. I had hoped to have the drawer hardware installed today as well, but that is a project for tomorrow.
2022-05-02

Hydro rates went to summer mode today, so with peak rates starting at 11:00, I tackled the heavy machining early. It wasn’t a convenient time for anyone to help, so I managed on my own. My shop is laid out well enough that I can manoeuvre large items without undue exertion. Flattening the first side on the jointer was physically the hardest, since it involves pushing a 12″ wide by 8′ long board thorough the cutters by muscle power. One board had quite a warp, so it was fairly thin by the time enough of it was flat.
Thicknessing the boards using the planer function of the Hammer A41 was more tedious, but physically less strenuous. I left the largest and cleanest at 1″, the other two long pieces at about 0.8″, and the short piece about 0.75″. Later in the afternoon I marked the cut lines for lengths. I had a very good workout today, and hopefully will sleep well.
2022-05-01
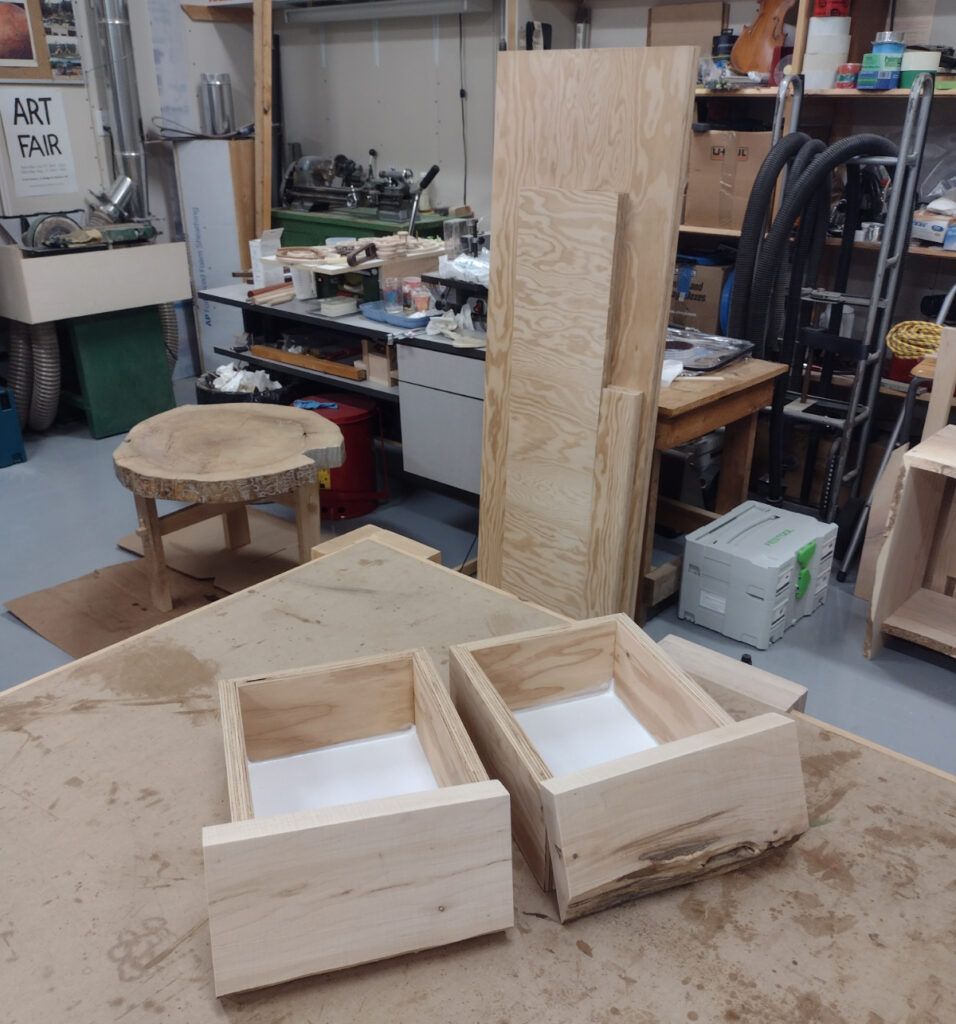
All the parts or materials were ready for the night tables. I used the same pattern for the shelves as for the inside walls. They are glued with a support block on the long side and a dowel on the short side. The back is unsupported, but located to be very close to the back frame support. The tops are cut from the same slab, but arranged symmetrically. The drawer fronts are also a continuous piece with a consistent pattern. It was a full steady day of work.
2022-04-26

The wood I plan to use for the base sides has voids. Since the drawer fronts will be cut out of these, it’s important that they be mechanically sound. So today I went to KJP and picked up a 3 litre kit of EcoPoxy. This stuff ain’t cheap! But for this purpose, it’s the most convenient and practical solution, and avoids the need to use several more pieces of wood to joint for boards of the required width. I mixed 2 batches in sequence. The first was about 500 ml, and didn’t fill the deeper imperfections. The second batch was about 350 ml, and still didn’t fill the worse voids. This epoxy is intended for fairly deep pours, and thus has a low viscosity. That’s fine for getting into small gaps, but it also runs out any small gap. I taped the backs of the boards with red polyethylene builder’s tape, but some gaps are inevitable.
Tomorrow morning I’ll mix another batch and try to fill the remaining voids. Hopefully the current pours wont’ all seep out.
2022-04-25

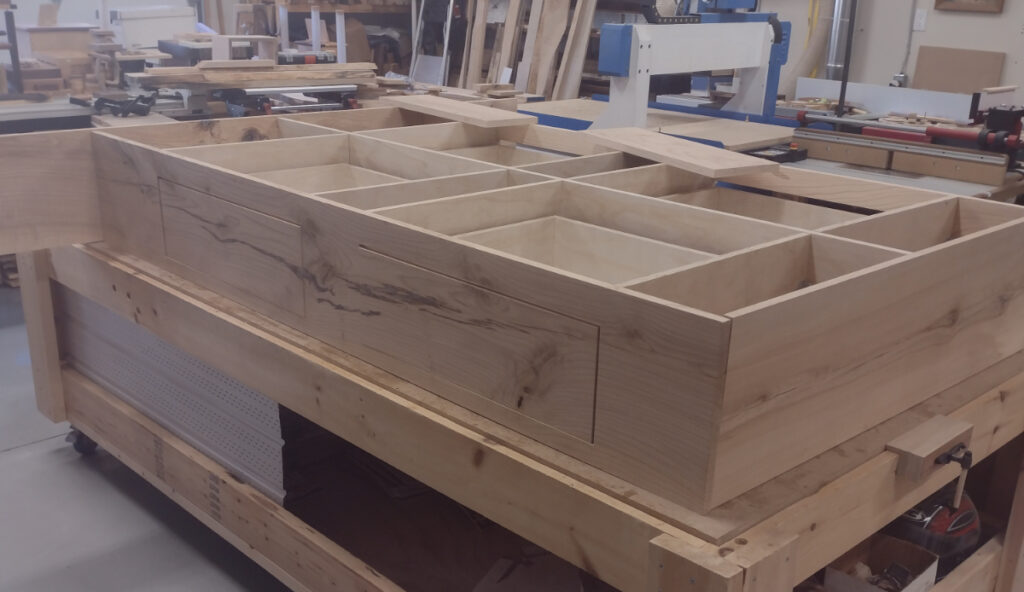
Over the past few days I’ve assembled all the 6 drawer carcases. Today I made the 2 headboard supports. The tops of the supports have a dowel connecting a removable top portion. This will make for a secure clip arrangement to keep the headboard in place, but still easily movable. The slabs for the outer frame are all cut to a consistent 12″ in width. There are quite a few voids, so tomorrow I’ll go to KJP in Ottawa for some epoxy with which to fill and seal the imperfections. Once the epoxy cures by the weekend I’ll plane to 1″ thickness and cut them to length. Then I can assemble the entire frame and install the drawer slides. In the interim I’ll build the night tables.
2022-04-19

We determined that using quality wood for hidden parts is silly, so I ordered 3 sheets of G2S plywood form a local supplier. It arrived Monday and I cut out the parts this afternoon. The third sheet had quite a warp in it, which should have warned me of the internal problems. Quite a bit of the middle was delaminated. I used it anyway, hoping to reglue the smaller sections. I also had to remove the platform footer section from the plywood list so I could get all the essential parts out of the three sheets. I think having a live edge showing at the foot of the platform will be nice anyway.
2022-04-16
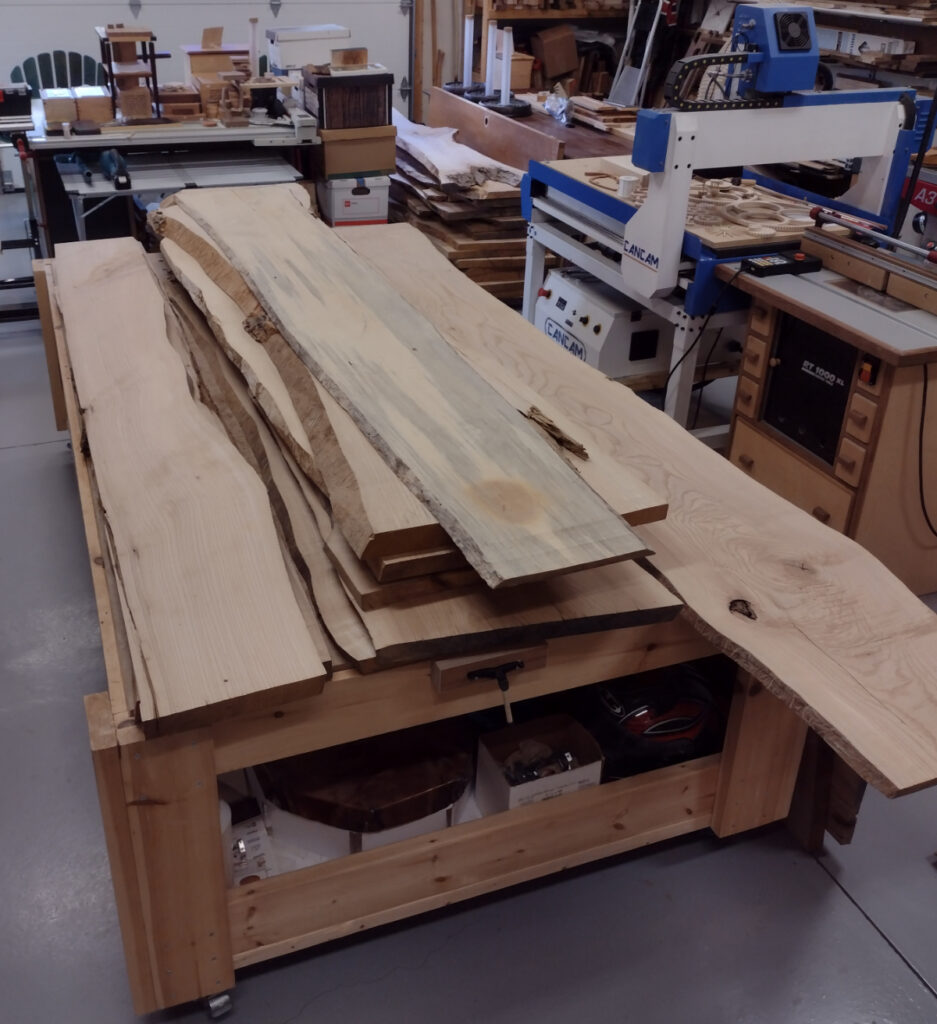
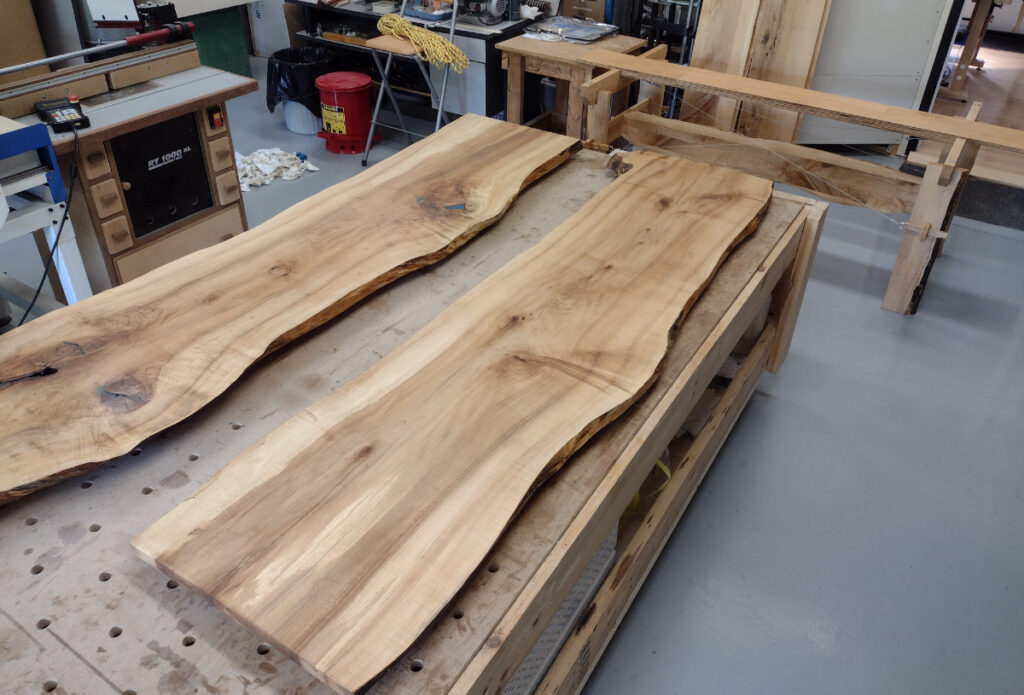
A few weeks ago a local business owner asked me to make a bed for his new apartment. He purchased the wood several years ago. There are 30 slabs, a mix of Maple, Oak, and Ash. We went through the pile a few days ago, then I went through the Maple and Ash again yesterday. I’ve suggested we use the Ash for the bed frame. We’ll put the Oak and Maple aside for other projects. He also agreed to not waste this valuable wood on the internal frame, so this morning I ordered 3 sheets of G2S plywood for the hidden support structure. I’ve also ordered all the hardware required.
The lower photo shows a very large slab leaning against the table. I’m suggesting we use this for the headboard. I’ll leave the live edges and just sand the surfaces before applying finishing oil. The slabs on the table will be dimensioned for the outer frame, night tables, and visible supporting structure.